2013 Ford Fusion Front Lights Diagram
Ford Fusion Headlight Bulbs Replacement Guide
How to change a low beam, high beam or front turn signal light bulb in a 2nd generation 2013-2016 Ford Fusion.
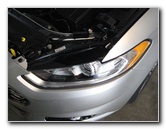
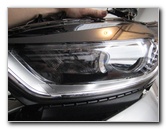
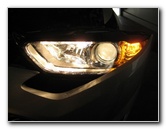
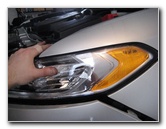
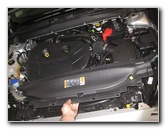
2014 Ford Fusion Headlight
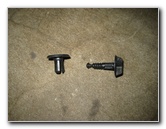
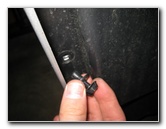
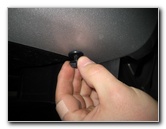
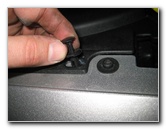
Pry Out Center of Fastener
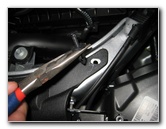
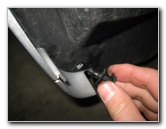
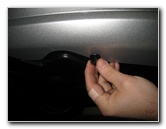
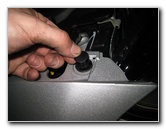
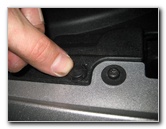
Remove Entire Fastener
Owners of other Ford or Lincoln vehicles such as the Focus, Fiesta, C-Max, Mustang, Escape, Transit Connect, Edge, Flex, Explorer, Expedition, Taurus, F-150, EcoSport, MKC, MKZ, MKS, MKX, MKT and the Navigator may also find these DIY instructions to be helpful.
The replacement bulb part numbers are as follows: Low Beam # H11, High Beam # H7 and Front Turn Signal # PWY24W.
The tools needed to complete this procedure include a flathead screwdriver, a pair of needle nose pliers, Torx T30 & Torx T25 screwdrivers, a 7mm socket and a 1/4" drive ratcheting wrench.
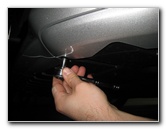
Pry Up Center of Fastener
Pry Up Other Fasteners
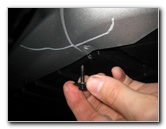
Remove With Pliers
In this tutorial, I'll show you how to change the bulbs in the driver side headlight housing. The procedure is the same for the passenger side.
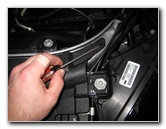
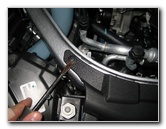
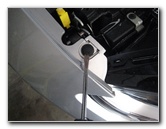
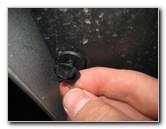
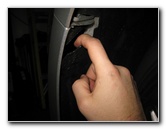
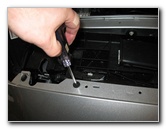
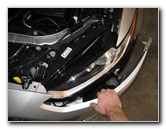
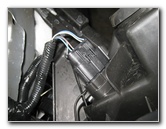
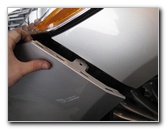
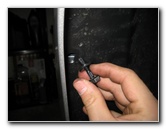
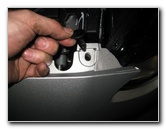
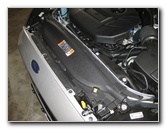
Locate the pop rivet fasteners that secure the black plastic radiator cover trim panel to the front bumper fascia and the front of the engine bay.
Lift up the center part of each pop rivet first with the flathead screwdriver before prying out the base of the fastener.
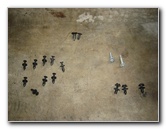
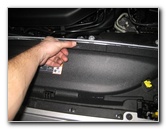
You really only have to remove the four pop rivets at the front edge of the radiator cover.
I made the mistake of removing all 8 pop rivets and then I pulled off the entire radiator cover.
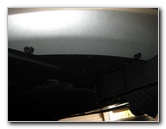
Pull Off Radiator Cover
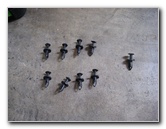
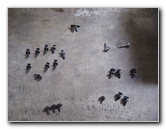
9 Pop Rivets Removed
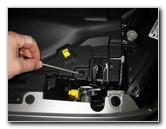
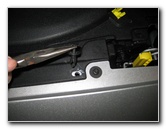
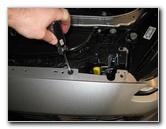
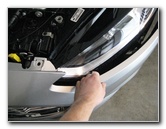
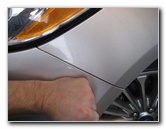
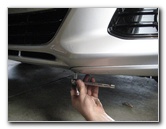
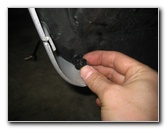
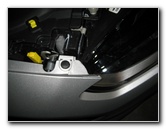
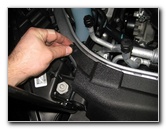
Pry Up Bumper Cover Fastener
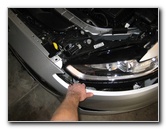
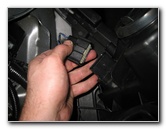
Pry out the larger pop rivet fastener on the bumper cover fascia right next to the inner corner of the headlight housing.
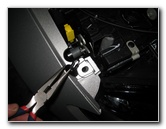
Pull Out With Pliers

10 Fasteners Removed

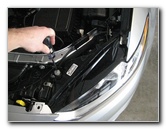
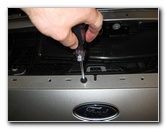
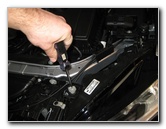
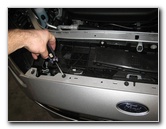
Remove T30 Bolt
Remove the bolt on the top of the headlight assembly near the outer edge of the vehicle by turning it counterclockwise with a Torx T-30 star bit screwdriver.
Outer Bolt Removed
Remove T25 Bolt
T30 & T25 Bolts Removed
Set the two bolts aside in a safe place.
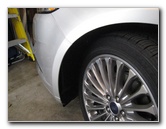
Turn Steering Wheel

Wheel Well Liner
Loosen Counterclockwise
Moving the front wheels will create more working room in the wheel well.
Locate the three fasteners on the front of the black plastic wheel well liner.
Loosen the thumb screws by turning them counterclockwise a few turns.
Thumb Screw Fastener
Remove 2nd Fastener
Remove 3rd Fastener
13 Fasteners & 2 Bolts
Under Corner of Bumper
Loosen Thumb Screws
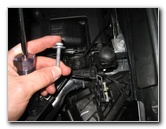
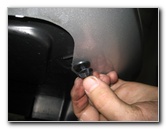
Locate the three fasteners on the underside of the bumper cover. There are two black plastic fasteners and a black metal screw.
Remove the two black plastic thumb screws by rotating them counterclockwise before pulling out the base of the fasteners.
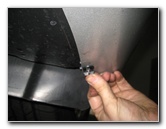
Remove 2nd Thumb Screw
Loosen 7mm Screw
Turn Counterclockwise
Set the 7mm screw aside in a safe place.
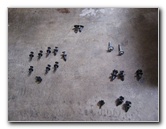
15 Fasteners, 1 Screw, 2 Bolts
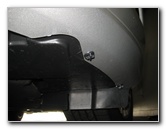
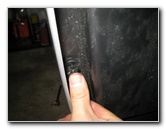
Pull Back Wheel Well Liner

Release Liner From Bumper
Torx T-25 Bumper Screws
Loosen Counterclockwise
3rd Bumper Cover Upper Screw
Remove the three screws by turning them counterclockwise with a Torx T-25 star bit screwdriver.
Set the three screws aside in a safe place.
All Screws & Fasteners
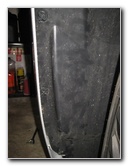
Separate Side Bumper
Gently Pull Forward
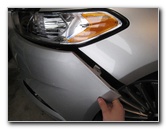
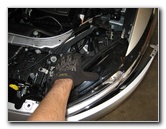
Gently pull out the outside edge of the fascia bumper cover to separate it from the front quarter panel.
Very gently pull the front of the bumper cover forward away from the headlight assembly.
Bumper Cover Loosened
Pull Forward A Few Inches
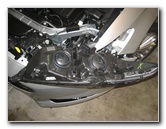
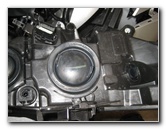
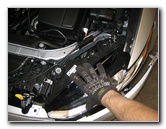
Pull Off Headlight Housing
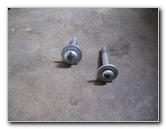
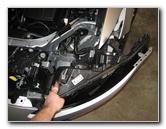
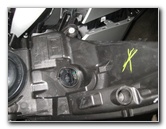
The headlight housing is still held in place to the vehicle by a metal peg or "spike" that acts as a friction fastener.
Ford refers to the peg as the "lower fixing point".
Firmly pull the headlight housing straight forward to disengage the peg from its mounting socket.
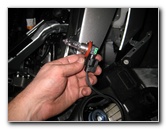
Metal Peg Disengaged
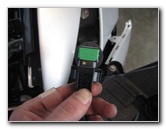
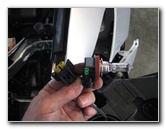
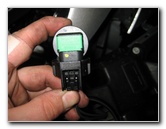
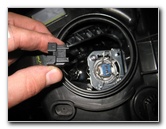
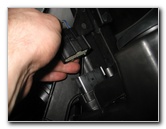
Electrical Connector
Slide Off Power Plug
Press in the release tab and slide the electrical connector straight out of it socket.
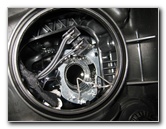
Turn Over Assembly
High Beam - Low Beam
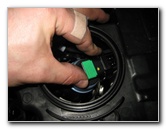
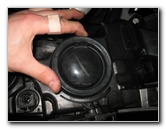
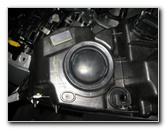
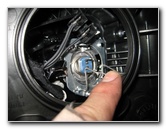
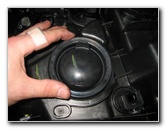
Rubber Dust Cover

Pull Off Dust Cap
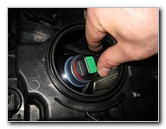
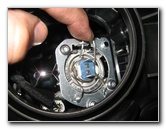
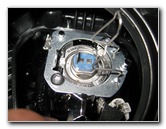
1/4 Turn Counterclockwise
Pull Out Old Bulb
Rotate the base of the old low beam bulb 1/4 turn counterclockwise and pull it straight out of the housing.
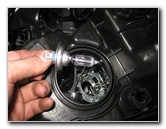
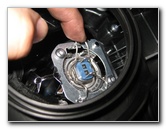
Press Release Tab
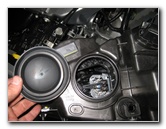
Old Bulb Disconnected

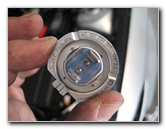
Empty Bulb Socket
Push On Power Plug
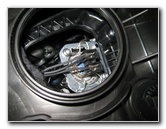
Insert New H11 Bulb
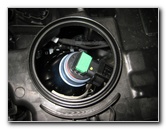
1/4 Turn Clockwise - Lock
If you do get the new bulb dirty, wipe it clean with a paper towel moistened with rubbing alcohol.
Push the power plug straight on to the base of the new low beam bulb.
Insert the new # H11 low beam bulb in to the housing and rotate it 1/4 turn clockwise to secure it in place.
Push On Round Rubber Cover
High Beam Inner Corner
Pull Off Rubber Cover
The High Beam light bulb is located near the inner corner of the headlight assembly.
Pull off the round black rubber dust cap from the back side of the housing.

High Beam Light Bulb
Pull Off Power Plug
Release Arm From Hook
Push in the end of the metal retaining arm and release it from the hook.
Swing Open Retaining Arm
Pull Out Old High Beam
Old Philips H7 Bulb
Pull the old high beam bulb straight out of the housing.
Empty Bulb Housing
Insert New # H7 Bulb
Secure Retaining Arm
If you do get the new bulb dirty, wipe it clean with a rubbing alcohol moistened paper towel.
Insert the new # H7 high beam bulb in to the housing.
Swing the metal retaining arm over the new bulb and attach it to the hook.
Push On Power Plug
Replace Rubber Cover
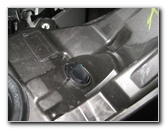
Turn Signal Bulb Socket
Replace the black rubber dust cap over the new high beam bulb.
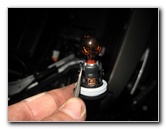
The Front Turn Signal light bulb is located at the outer edge of the headlight housing.
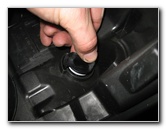
1/4 Turn Counterclockwise
Remove Bulb Socket

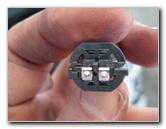
Pull Out Retaining Clips
Loosen Clips
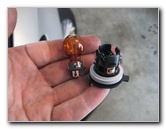
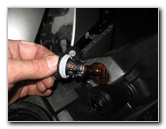
Pull Out Old Turn Signal Bulb
Philips PWY24W
Carefully pull the old bulb straight out of the socket.
Push a new # PWY24W turn signal bulb straight in to the socket.

Re-Insert Bulb Socket
1/4 Turn Clockwise

Metal Peg / Spike
Push On Power Plug
Test New Headlight Bulbs
Push On Headlight Assembly
Before you go through the trouble of re-attaching the front bumper cover, test the new light bulbs by turning on the headlights, flashing the high beams and activating the hazard signals.
Line up the metal peg on the back side of the headlight housing with its socket on the front of the vehicle.
Firmly push the headlight housing back in to place.

Tighten T30 Outer Screw
Tighten Inner T25 Screw
Headlight Assembly Flush
Tighten it in the clockwise direction with the Torx T30 star bit screwdriver until it is snug.
Then replace the smaller silver metal screw closer to the inner corner of the headlight housing and tighten it in the clockwise direction with the Torx T-25 screwdriver.
Make sure that the headlight housing is flush with the quarter panel.
Line Up With Quarter Panel
Re-Attach Fascia Cover
Upper Bumper Cover Screws
Replace the three Torx T25 screws along the upper part of the front bumper cover by turning them clockwise.
Replace 7mm Screw
Re-Insert Fasteners
Tighten Thumb Screws
Re-insert the two black plastic fasteners on the underside of the bumper cover and tighten the thumb screws in the clockwise direction.
Two Fasteners Replaced
Wheel Well Liner Fasteners
Re-Insert Thumb Screw
Tighten the three thumb screws in the clockwise direction until they are snug.
Tighten Thumb Screws
3 Wheel Well Liner Fasteners
Line Up Radiator Trim Cover
Re-Insert Pop Rivet
Push In Center Piece
Fastener Secured
Push down the center part of the pop rivet to secure the fastener in place.
Re-Insert Other Pop Rivets
Push Down Center Part
Radiator Cover Fasteners
Last Pop Rivet
Radiator Cover Replaced
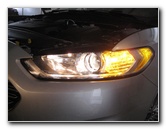
Testing Headlight Bulbs
Test the new light bulbs by turning on the headlights, flashing the high beams and by activating the hazard signals.
For more, check out my other 2013-2016 Ford Fusion DIY Repair & Maintenance Guides.
Source: https://www.paulstravelpictures.com/2013-2016-Ford-Fusion-Headlight-Bulbs-Replacement-Guide/
Posted by: elizahoonssa.blogspot.com


Komentar
Posting Komentar